

Hanging a picture frame requires thoughtful planning to guarantee proper placement, secure mounting, and a lasting visual impression. Start by focusing on the height, selecting compatible hardware, and ensuring the wall is ready with precise measurements and the right tools.
Key Takeaways
- Position the center of the frame 57-60 inches off the floor for a natural eye-level view. Keep it away from direct sunlight or busy areas to prevent damage or accidents.
- Pick hardware suited to both the frame’s weight and the wall material, such as picture hangers, D-rings with wire, or adhesive strips.
- Measure the hanging points on the frame carefully, mark corresponding spots on the wall, and use a level to ensure straight alignment before securing it.
- Attach heavier frames to wall studs for better support. Double-check placement to avoid creating unnecessary holes.
- Inspect the hardware regularly for signs of wear. Use a soft cloth to clean the frame and avoid chemicals or long-term exposure to sunlight to keep it in good condition.
Finding the Perfect Spot for Your Picture Frame
I always start by placing the center of the picture frame 57-60 inches from the floor. This height keeps it at eye level for most people, delivering a natural and comfortable viewing experience. Wall space matters too—make sure your frame isn’t too close to furniture or placed where movement could lead to accidental bumps. High-traffic areas like hallways can work, but keep the frame out of reach of constant contact.
Sunlight is a silent artwork killer. Position frames away from direct sunlight to avoid fading. Instead, use soft ambient or accent lighting to highlight your art and create depth in the room. For larger frames, calculate the best viewing distance using this guideline: Viewing Distance = Picture Height x 1.5. This ensures the picture feels properly scaled to the surrounding space.
Gallery walls offer endless creative possibilities. Keeping an average spacing of 2-3 inches between frames ensures a pleasing rhythm without overcrowding. Arrangements like grids or asymmetrical layouts let you express personality while maintaining balance. Spacing not only elevates aesthetics but also keeps the focus on individual pieces.
Lighting plays a vital role in visual appeal. If you’re planning a gallery wall, adjustable spotlights can bring each frame to life. For help positioning frames neatly, check out this guide on DIY picture frames. It’s filled with tips to tie everything together seamlessly.
Choosing the Best Hardware for Your Frame and Wall Type
Matching the correct hardware to your frame’s weight and wall type is essential to ensure secure and long-lasting placement. Smaller, lightweight frames work well with picture hangers or sawtooth hangers. For medium-to-heavy frames, I prefer D-rings or hanging wire as they distribute weight evenly. If you need a damage-free option, adhesive strips can be effective, holding up to 16 pounds depending on the brand.
Walls also play a significant role in your decision. Drywall pairs easily with standard nails or anchors. If your wall is plaster or brick, use special masonry anchors or screws to avoid unnecessary damage. Here are step-by-step tips for attaching hardware to various surfaces:
- Drywall: Tap a small nail into the desired spot for lighter frames or use wall anchors for heavier ones.
- Plaster: Drill a small pilot hole, then insert a plastic anchor and screw.
- Brick: Use a masonry drill bit to make a hole, followed by inserting a heavy-duty anchor before attaching hardware.
Understanding the pros and cons of each type of hardware can guide your final choice:
- Picture hangers: Affordable and simple but not ideal for heavy frames.
- D-rings/wire: Reliable for various weights but requires extra effort to install.
- Sawtooth hangers: Easy to use but best for small frames.
- Adhesive strips: Cause no wall damage, though limited by weight capacity.
If you’re working on creating or modifying your own display, you could explore DIY picture frames for more customization options!
Measuring and Preparing for Success
I always start by measuring the distance between the hanging points on the back of the picture frame. Whether it’s D-rings or a wire, grab a measuring tape and note the exact distance. To get the wall ready, I mark the two spots using a pencil, making sure they match the frame’s measurements.
Accuracy matters. That’s why I rely on a level to keep everything straight. Place it under the marks on the wall to confirm they’re even. If you skip this step, you might end up with a crooked picture. For heavier frames, I recommend using a stud finder. Run it along the wall to locate the wooden studs, which offer better support. Be cautious with stud finders—they sometimes give false positives, especially if you’re near metal pipes or wiring. Slide the finder over the same area a few times to confirm.
To avoid patching unnecessary holes, I live by the “measure twice, hang once” rule. Double-check your measuring tape, your marks, and your level before drilling or hammering. This small effort saves a lot of frustration later.
If you’re working with smaller or custom frames, I’ve written about creative options in DIY picture frames that might help you refine your choices. Keep everything aligned from the start, and the finished look will reflect the effort you put in.
To hang a picture frame securely, start by picking the right hardware—nails or screws—based on your wall type and the frame’s weight. For drywall and light frames, nails typically work well. Heavier frames or plaster walls call for screws, possibly paired with anchors for extra stability.
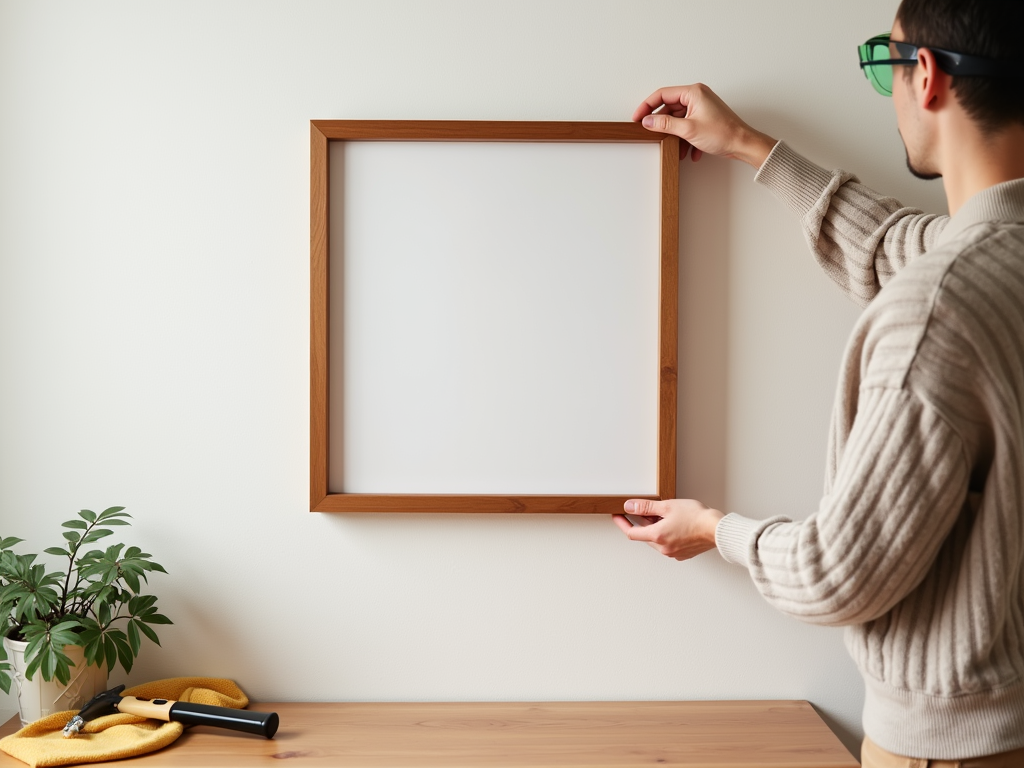
Use a hammer for nails or a screwdriver for screws, depending on your choice. While handling tools, I always wear protective eyewear to guard against accidents, especially if pieces of wall or hardware might fly loose. Safety first.
Once the frame is up, grab a level to check its alignment. Small adjustments make a big difference. If the frame tilts, gently shift one corner until balanced. For tips on creating your own frame, explore DIY picture frames.
I always make it a habit to check the stability of the hardware regularly, especially if I’m dealing with heavier frames. The last thing you want is a shifted frame or worse. Inspect screws, nails, or adhesive hooks for any wear, and tighten or replace them as needed.
Dusting your frame keeps it looking its best. I use a soft, lint-free cloth for delicate surfaces and avoid harsh chemical cleaners to preserve the finish. For frames with intricate designs, a gentle brush can help get those hard-to-reach corners.
If your frame sits in direct sunlight, fading could be an issue. I’d suggest looking into UV-protective glass or relocating it to a safer spot. For frames with artwork, controlling humidity levels helps prevent warping or mildew. You might want to explore how to make custom frames for specific materials by checking out DIY picture frame ideas.
Sources:
Popular Mechanics
Family Handyman
The Spruce
Better Homes & Gardens (BHG)
This Old House