

Creating stained glass art bridges age-old craftsmanship with personal creativity. By picking the right tools, materials, and techniques, anyone can design captivating pieces that fill spaces with brilliant light and color.
Key Takeaways
- Material Selection: Opalescent, cathedral, textured, streaky, or iridescent glass panels each bring a distinct quality in how they diffuse or reflect light. Pick options that suit your design goals and lighting environment.
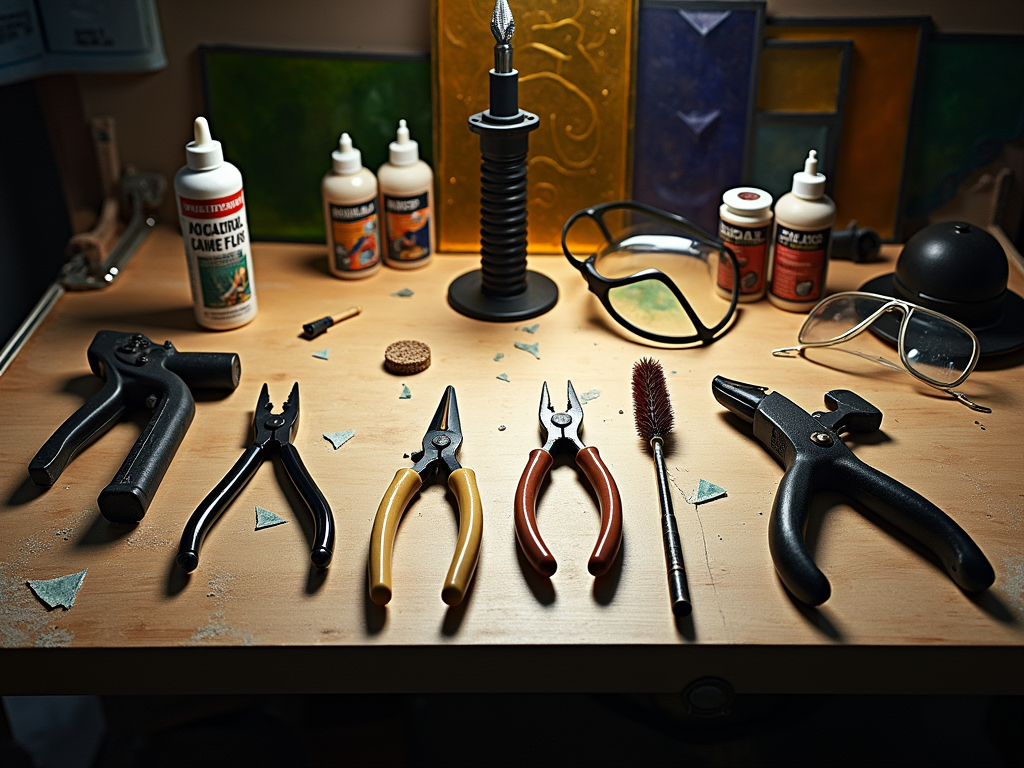
- Essential Tools: Equip yourself with glass cutters, breaking pliers, a reliable soldering iron, and the necessary safety equipment. These basics ensure smoother work and safe handling.
- Step-by-Step Process: Follow each phase—designing, cutting, assembling, soldering, and framing—with patience and precision. This approach results in polished, high-quality artwork.
- Safety Precautions: Always wear protective gear, work in a well-ventilated space while soldering, and handle edges with care to avoid injuries. Reducing hazards keeps the focus on the creative process.
- Community and Resources: Join online groups, attend local classes, and explore available design patterns. These resources provide motivation, helpful tips, and opportunities to refine your craft.
A Journey Through Stained Glass: From Ancient Art to DIY Masterpieces
Stained glass has a rich history that dates back to the Roman Empire. Early designs were simple, featuring basic geometric patterns meant to enhance natural light. During the 12th–16th centuries, the art reached extraordinary heights in Gothic architecture. Cathedrals like Chartres in France showcased stunning, intricate biblical narratives rendered in vibrant glass. These windows transformed sunlight into spiritual storytelling.
The style evolved even further with the rise of the Art Nouveau movement. Artists like Louis Comfort Tiffany redefined stained glass in the late 19th century, introducing opalescent glass and fluid, nature-inspired designs. His Tiffany Studios became renowned for their luminous floral lamps and delicate panels.
Today, stained glass has come full circle, blending centuries of tradition with modern creativity. DIY enthusiasts can explore geometric or narrative designs inspired by this history. Want to get started? Check out my guide on how to make stained glass.

Choosing the Right Glass for Your Project
Different glass types bring unique characteristics to a design, and knowing how each interacts with light makes all the difference. Opalescent glass has a cloudy finish that softens light, making it great for private spaces or abstract patterns. Cathedral glass, on the other hand, is transparent and colored, offering sharp clarity ideal for traditional or intricate designs.
Textured glass adds a three-dimensional feel, with patterns that break up light in dynamic ways. For bolder visuals, streaky glass blends vibrant colors, creating playful, whimsical effects. Iridescent glass shimmers and catches the light, adding a dreamy, reflective surface perfect for accent pieces.
The glass’s composition directly impacts how it transmits light. Opalescent diffuses light beautifully, while cathedral allows it to shine through vividly. If you’re planning detailed cuts, here’s a helpful guide on cutting stained glass. Choosing thoughtfully will elevate any project.

Starting your stained glass journey means gathering the right tools. Glass cutters come first. Beginners will appreciate a manual cutter—it’s affordable, around $10–$20, and perfect for precise control. An electric glass cutter, priced upwards of $100, works well for intricate projects. Pair your cutter with breaking pliers to cleanly separate glass pieces, and running pliers for guiding straight-edge breaks.
Assembly Essentials
For assembly, you’ll need a good soldering iron. A 100-watt model delivers enough heat for soldering lead came or copper foil. Flux is critical—it preps the metal, ensuring solder bonds beautifully. Solder itself (60/40 tin-lead is standard) comes in rolls for easy application. Patina lets you darken solder lines for a polished finish.
Additional Tools
Other must-haves include:
- Safety glasses for protection
- Pattern shears for precise trimming
If you’re interested in learning how glass cuts work, check out this guide on cutting stained glass.
Step-by-Step DIY: Bringing a Stained Glass Panel to Life
Creating your own stained glass panel is such a rewarding project. I’ll walk you through every step, starting with the design and moving all the way to the final finishing touches. By the time you’re done, you’ll have a piece of art you can proudly display.
Designing Your Panel and Preparing Your Pattern
Start by sketching out your design on paper or using software like Adobe Illustrator. There are also free resources online with beginner-friendly patterns if you don’t want to start from scratch. Remember to keep your shapes reasonably simple, especially if you’re new to this. Once finalized, print or trace your pattern at full size. This will serve as your guide for cutting and assembling the glass.
Cutting and Shaping Your Glass
Use a glass cutter to score along your pattern lines and gently break the glass—it’s all about steady pressure. For intricate shapes or tight curves, I always recommend checking out these glass cutting tips. A grinder can smooth out edges for a perfect fit, especially if you’re working with tricky details.
Foiling and soldering are where the glass truly starts coming together. Copper foil gives you flexibility for delicate designs. Lead came, while traditional, is better for larger pieces. Ensure you clean your glass edges before applying copper foil; this helps the solder adhere properly.
Soldering, Framing, and Finishing
Use solder wire and an iron to join your pieces. Copper foil technique makes for clean, strong joints, whereas lead came creates a classic, authentic look. Once your solder work is done, frame your panel with sturdy zinc came or wood. Finally, polish the finished panel with glass cleaner, and you’re all set for display.
Safety First: Protecting Yourself While Working with Glass
Working with stained glass can be incredibly rewarding, but safety comes first. I always make sure to wear gloves to protect my hands from sharp edges and safety glasses to shield my eyes from flying shards. If you’re soldering, good ventilation is non-negotiable. Lead fumes can pose serious health risks, so use a fan or solder in an open area to keep the air clean.
Handling sharp glass demands caution. Holding pieces securely and cutting away from your body is smart. Make sure to dispose of lead waste properly—seal it in a container before trashing it. I wash my hands thoroughly after every session, especially before eating or touching my face. Keeping lead exposure in check protects your health long-term.
For more tips on handling sharp materials, I recommend reading how to cut stained glass safely here.
Finding the right patterns can make or break a stained glass project. I often start with online repositories, which are packed with free and paid designs. Sites like FreePatternsArea or even Pinterest offer endless inspiration. If you’re into digital designing, there’s software like GlassEye 2000 that helps you craft custom layouts. For a more tactile approach, books dedicated to stained glass art are fantastic—they offer patterns you can trace straight onto your medium. And don’t overlook nature! Organic shapes like leaves or flowers make great templates if drawn directly or found in nature photography.
Building a community around your craft isn’t just helpful—it’s motivational. Online spaces like DelphiGlass forums or specific Reddit groups for stained glass creators are excellent for advice, feedback, or even troubleshooting technical issues. Every time I join workshops, I meet people who share tips I didn’t know I needed. Local art centers often host classes, and many participants are just as excited to connect as they are to learn.
I also draw inspiration from modern stained glass artists. From sleek geometric pieces to playful reinterpretations of traditional motifs, creators today push boundaries. As I browse their galleries, I often pick up clever ideas. Alongside their art, pay attention to where they source tools and materials—some highlight great suppliers. For my own projects, I lean on trusted shops to stock essentials like cutters, glass sheets, and lead cames. If you’re just starting, this guide on how to make stained glass is a great primer.
Sources:
DelphiGlass Stained Glass Supplies
An Illustrated Guide to Stained Glass by J.A.F. Divine
The Complete Stained Glass Artist: Techniques, Projects, Inspiration by Brenda Griffith
Stained Glass: Principles & Techniques by Peter McGrain